
How to Teach Piano Students to Read Music on the Staff
A Simple Approach to Confident Staff Reading
Teaching beginners to read music on the staff doesn’t have to start with Middle C — and in many cases, it shouldn’t. Students build far stronger reading fluency when staff concepts are introduced through patterns, intervals, and off-bench activities before they ever try to decode isolated notes. In my studio, I use a sequence that begins with visual patterns, directional movement, and hands-on tools like Sound Shapes to help students internalize how the staff actually works. This approach creates musical understanding from the inside out, reduces overwhelm, and prepares learners to transition smoothly into full grand staff reading once written notation appears in the method book.
Why You Shouldn’t Start with Middle C
Most methods start reading on Middle C, but Middle C is actually the worst place to begin if you want students to understand how the staff works. It isn’t even on the staff — it floats between the clefs on its own little ledger line. That makes it visually unique, but not representative of how real staff reading functions. Middle C is excellent for memorization because it looks different, but beginning here doesn’t teach students what lines and spaces actually mean. If we want students to truly read music instead of guessing letters, we have to begin with concepts that appear consistently on the staff, not the exception to the system.
Build Pre-Staff Skills Before Introducing Notation
Students need strong keyboard geography and directional reading skills before the staff ever enters the picture. Spend time developing pentascales, arpeggios, finger patterns, bar lines, measures, time signatures, and simple alpha-note melodies while still off-staff. This gives students the ability to decode movement (up, down, same), recognize rhythmic flow, and connect sound to the keyboard long before they have to attach those ideas to lines and spaces.
When the staff becomes the last new thing introduced — not the first — everything “clicks” instantly. Students aren’t trying to learn note names, finger numbers, rhythm, keyboard mapping, and staff placement all at once.
This is exactly why The Cadenza Piano Method includes two full off-staff books — one on black keys, one on white. They fully develop pattern reading, technique, and directional understanding, so the staff can become the missing piece that brings everything together.
How to Introduce the Staff (In a Way That Makes Sense Immediately)
Most students have seen printed music before, so the staff won’t feel completely foreign. Lean into that familiarity. Make it an exciting moment:
“I know you’ve seen music written like this — today we finally get to learn what it means.”
Explain that the staff is simply a map of the piano. Notes either sit on a line or in the space between lines. That’s it — two categories.
Start With Stepwise Placement (Line–Space–Line–Space)
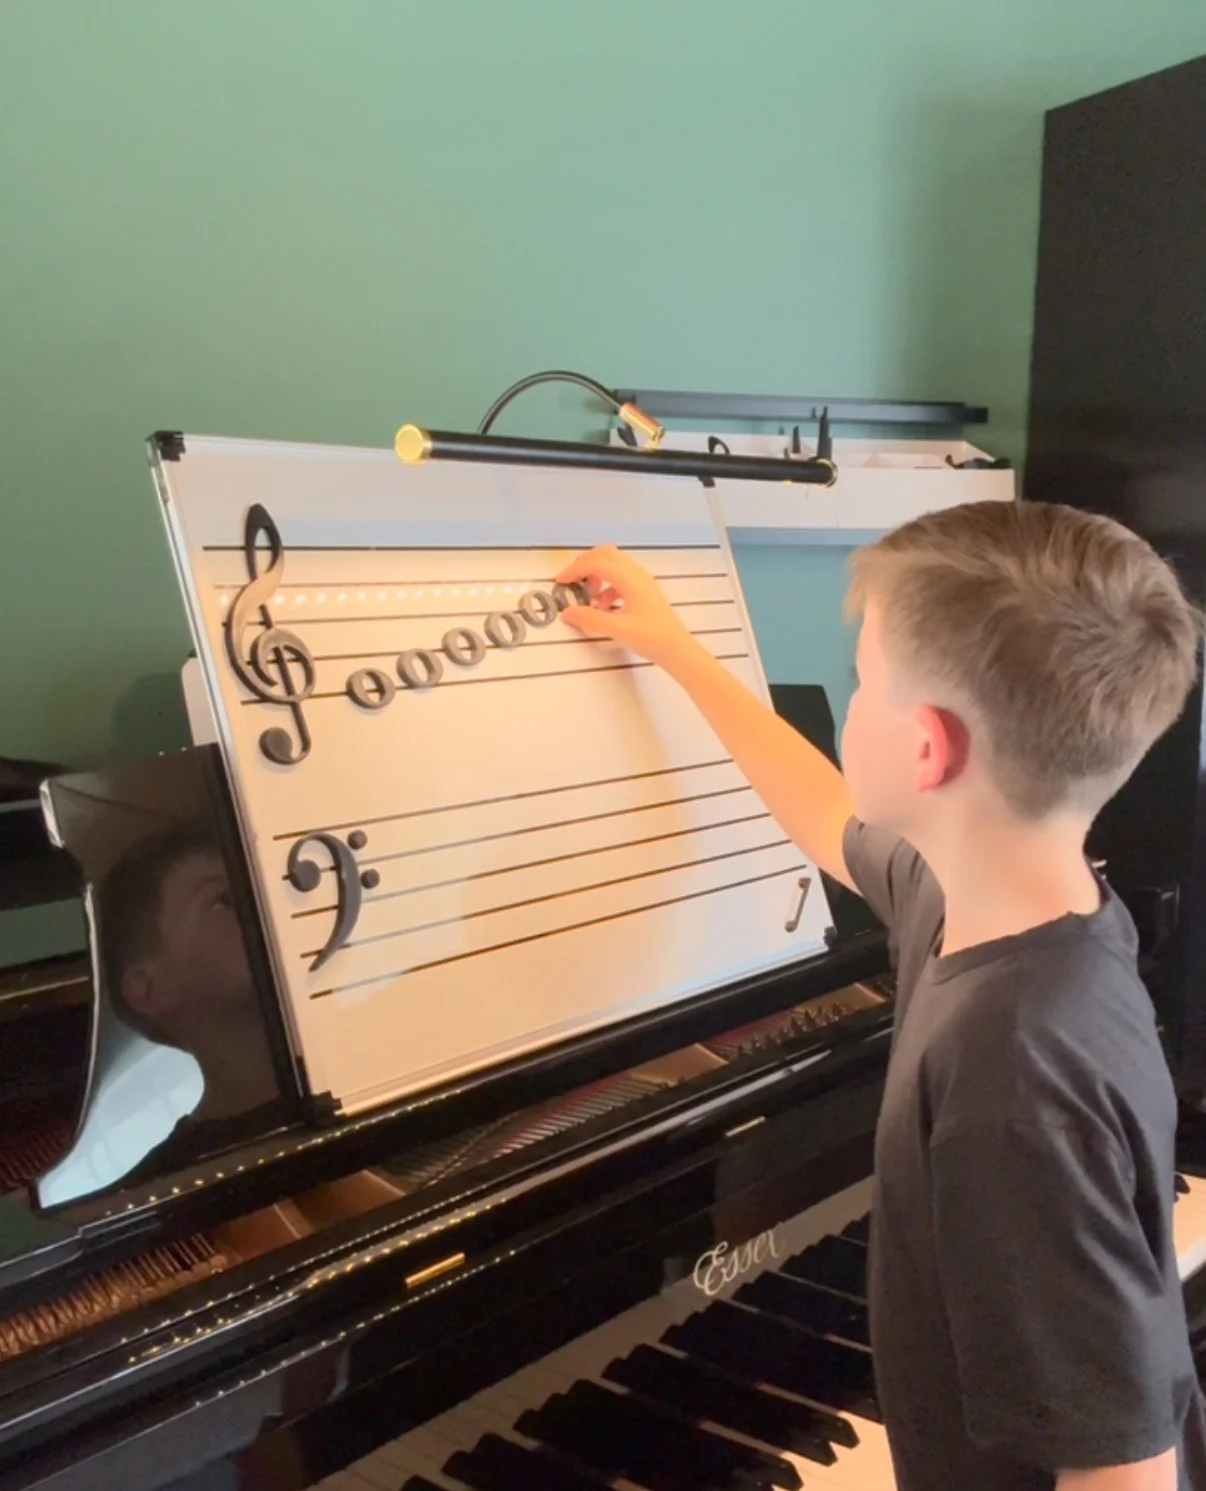
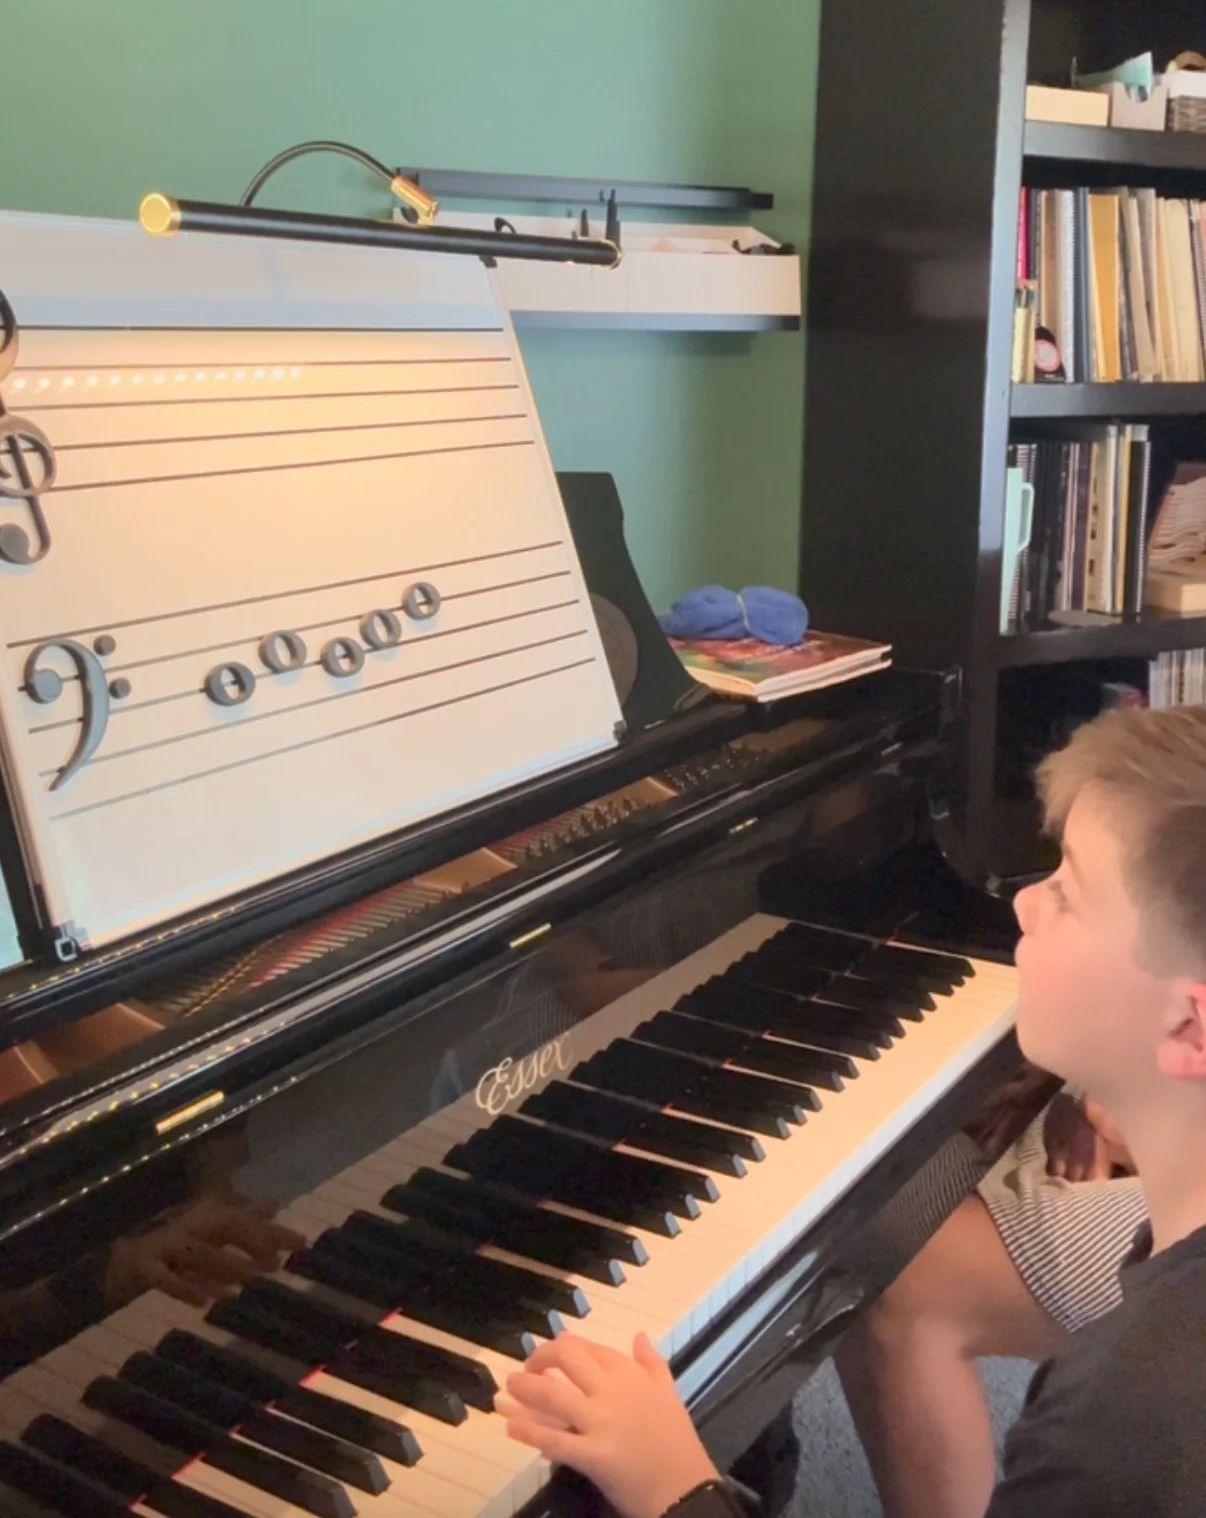
At this stage, I like to use my Sound Shapes, my magnetic staff tool, so students can experiment with placing line and space notes before they ever read them in notation. Hands-on placement builds instant understanding of how the staff is structured.
Place a whole note on Treble E. Then place whole notes upward in order, labeling the pattern verbally (line, space, line, space). Tell the student these notes are placed “in order,” and have them play the pattern on the piano using language like “go to the very next key up.”
Next, give the student a new starting note and ask them to place the rest of the whole notes “in order” going up from that point. You provide the starting pitch and show the key on the piano, and they place the staff notes and count up to figure out the ending note name.
Repeat this up and down, in both clefs, until the student can confidently place a line-space pattern without help.
Do not use patterns that cross into the middle B–C–D region yet.
Have students play each pattern using finger 2, hopping cleanly from one key to the next. Every time, ask them to identify the ending note by working it out, not guessing. This step establishes the core architecture of the staff before adding complexity.
How to Introduce Middle C (Only After the Staff Makes Sense)
Once students understand the line–space stepping pattern and can place notes comfortably, you can finally introduce Middle C. Build an example where the pattern naturally descends toward C.
When you reach the bottom line (E), say,
“Uh oh — we’re out of room on the staff, but we still have two notes left.”
Before placing D, ask:
“Should the next one be a line note or a space note?”
(Answer: space.)
Place D.
Then ask again:
“What should come next — line or space?”
Line.
But there are no more lines.
This is the perfect moment to explain ledger lines. Sound Shapes have a ledger line piece that goes directly on top of any note.
Repeat the stepping activity, now showing how notes move beyond the five lines in both directions. Include the middle-region notes B–C–D and the notes above/below the staff.
Now Middle C makes complete sense because it fits into the stepping system the student already knows. Once students understand how the staff functions, we’re ready to start Level C of the Cadenza Piano Method, where Middle C becomes the first anchor note they memorize. This can all be done in 1-3 lessons, depending on the students age and capacity for understanding.
Playing First Pieces on the Staff
Begin by placing whole-note melodies on the staff that move stepwise up, down, or repeat. Give students the starting note and starting finger, and have them play the melody by thinking in terms of movement (up, down, or same), not letter names.
If the student completed The Cadenza Method Levels A and B, they will already have:
rock-solid directional reading
solid finger control
strong keyboard navigation
That foundation makes these first staff pieces feel natural instead of overwhelming.
How to Introduce Skips (3rds) on the Staff
Once steps are comfortable, introduce skips using the same method — but now the pattern is:
line → line → line
or
space → space → space
Place a starting note, then place notes up or down in skip order. Have the student play using finger 2 again, hopping in clean thirds.
Then move into skip-based melodies:
Write a simple step + skip pattern
Ask students to identify and isolate the skips
Have them mark skipped notes (place an X on the skipped line or space)
Then play the melody using movement awareness
This builds true intervallic reading, not letter-guessing.

When to Memorize Note Placement
Memorization does matter — but only after intervallic understanding is strong.
Students need a few memorized reference points to orient the staff, otherwise there’s no anchor for all the interval work.
This is the point where Middle C becomes useful again:
It’s visually distinctive, it sits in the center of the grand staff, and its location on the keyboard matches its visual placement.
After that, move to a few reliable guide notes. Some teachers use Treble G and Bass F, but many beginners find them confusing. I’ve seen more consistent success teaching with Treble E and Bass A as initial reference points — they’re easier to spot, easier to describe, and less visually crowded.
Memorization becomes meaningful after the pattern system is internalized.
How to Connect Staff Reading to the Keyboard
Students become confident music readers when the staff and keyboard feel like two versions of the same map. Once stepwise and skipwise patterns are clear on paper, bring the movement directly to the instrument.
Start by showing how lines and spaces translate to physical space on the keyboard:
A step on the staff means moving to the very next key
A skip means skipping only one key
A repeated note means staying on the same key even if the hand shifts
Encourage students to speak their movements aloud as they play (“up a step,” “down a skip,” “same”), which reinforces both spatial awareness and interval recognition. When this connection is clear, the staff is no longer a decoding exercise. It becomes a predictable set of directions the student can interpret instantly.
Off-Bench Tools That Make Staff Reading Easier
Hands-on learning accelerates staff fluency faster than anything else. When students manipulate notes themselves, they internalize line/space structure, movement, interval quality, and keyboard relationships far more deeply than by reading alone.
Tools like magnetic music notes make this process intuitive. Use them for:
• Direction games
Give a starting note and let the student build a melody using “up,” “down,” or “same.”
• Step/skip mapping
Place a note and ask students to continue the pattern while naming “line/space” or “skip/step.”
• Staff-to-keyboard matching
Have students place a pattern on the staff and then map each note to the piano.
• Build-your-own melodies
Students create short patterns and identify the movement required to play them.
• Rhythm + staff mini-activities
Combine note placement with simple rhythms to reinforce multiple concepts at once.
Moving off the bench and back again builds flexible musical thinking — and helps students view the staff as a helpful tool rather than something intimidating.
Common Mistakes Teachers Make (And How to Avoid Them)
Even experienced teachers can unknowingly make early staff reading harder than it needs to be. Here are some pitfalls to avoid:
• Starting with letter names instead of movement
This leads to guessing instead of reading.
Solution: Teach intervals and patterns first.
• Introducing too many notes too quickly
This overwhelms students and disconnects the staff from sound.
Solution: Introduce new notes slowly and reinforce them heavily. Level C of The Cadenza Piano Method has ample opportunities for reinforcement.
• Beginning with the middle-region notes (B–C–D)
These notes create the most confusion.
Solution: Start with clearer regions of the staff before moving inward.
• Avoiding ledger lines too long
Students need early exposure so ledger lines feel normal.
Solution: Introduce middle C and its neighbors through stepwise extension exercises.
• Skipping the pre-staff phase
Without strong keyboard and directional foundations, staff reading struggles.
Solution: Build pre-staff mastery first — this is exactly what The Cadenza Method Levels A & B are designed for.
By avoiding these common mistakes, staff reading becomes logical, predictable, and genuinely enjoyable for beginners.
Staff Reading Should Feel Logical, Not Mystifying
Teaching beginners to read the staff becomes so much clearer when we introduce it through intervals, patterns, and strong keyboard foundations. When students already understand how music moves, the staff simply becomes a visual map of skills they’ve practiced off-staff. With the right sequence and pacing, even brand-new beginners can turn into confident, accurate readers far sooner than most teachers expect.
If you found this helpful, you may also enjoy my upcoming articles on beginner piano reading, staff fluency, and off-bench teaching tools.


